
Our cob oven was one of the first projects completed as a group. The first task was to clear and level the site, then build up a U-shaped dry-stacked stone foundation to a height of about 20". A board was set in place with cob to span the gap.

Atop the board, we created a 2” thick perimeter of cob about 4” high to act as a sort of bowl to hold our insulative layer of glass bottles and sand. Levelling the sand served as the base for the firebrick floor of our oven’s interior.

After laying the firebrick, we created a sand dome to act as the oven's form. The sand was moistened slightly (finer sand would have made the dome sculpting much easier, but we used what we had), then formed into a dome 40cm high with a base circumference of 60cm. Wrapping the dome in a clay-slipped hessian sack, we let it set overnight.
Two days later, we began to prepare materials for the next steps. A ‘fire-cob’ mix of 1 part pottery clay to 4 parts sand was the first layer (the finer the sand the better – large grits or rocks could fall from the oven’s ceiling on to your bread or pizza), and we slowly packed it around the sand form 8cm thick, always pressing down rather than in toward the sand base. It was important to build in even levels and keep each level perpendicular to the sand form’s curve. Though we had sculpted this layer around the door (12” wide and 10” high) as it was set in place, Christo suggested it would be easier to create the full dome, then cut the doorway out later.

After the fire cob mix was applied and then smacked with a board to compact it, a layer of slipped straw was wrapped around the fire-cob 12cm thick. This was followed shortly after by wet cob ‘pancakes’, applied thinly over the slipped straw insulation. We then dug out the sand form. The next week was spent drying the oven out. We waited two days after the outer layer had been applied, then began keeping small kindling fires inside of the oven. After several days, it was possible to see steam rising up from the oven, meaning that the moisture was travelling to the outside. Because the back side received little sun or wind, it was damp for almost a full week. Although a few small holes had appeared (straw catching fire and burning through), they were easily patched with slipped straw and cob. One week after the first kindling fires, we built a rather large one to finish the drying process. That evening, we baked our first sourdough breads using our hand-made peels.

 Then the following evening we applied a coat of plaster and invited Paul & Therese’s family and friends over for a pizza party.
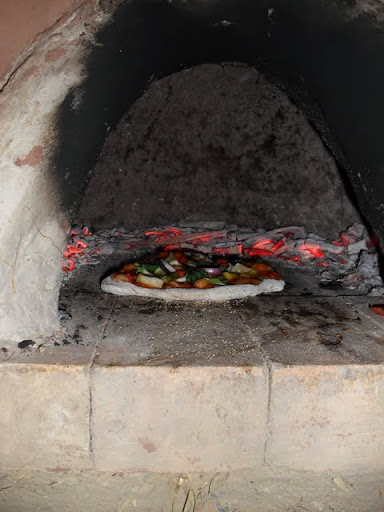
Well said!!!
ReplyDelete